Left 4 Dead 2 Infected Eater's Guide
| « | New Infected Types | Old Infected Types | » |
| Infected Basics |
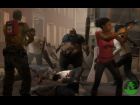
There are seven playable infected types in Left 4 Dead 2. Only one of each infected type can appear at a time. Infected have a limited life bar that cannot be refilled. If the survivors kill an infected player, the infected player will respawn after a short period of time as indicated by a countdown at the top of the screen.
When you spawn as a special infected, you must first choose you the area to appear. You cannot be in the survivor's field of vision, but you can be very close as long as you are hidden from view. If the survivors are in the safehouse or safe area, then you cannot spawn.
If you get separated from the survivors by a significant distance, you'll be allowed to enter spawn mode near the survivors to instantly catch up. Sometimes it's better to run away from the survivors to catch up!


The special infected have their own ways of traversing levels. They can climb walls using specially marked tracks to get the drop on survivors from rooftops.
| Jockey |
The Jockey's main purpose is to separate a single survivor from the pack. To do this, you must carefully select a survivor, preferably someone who is already straggling. The Jockey's primary attack is a leaping grab that allows it to attach to a survivor's upper torso. You need to aim this leap directly at a survivor from a short distance away, which means you'll be exposed to fire on your approach. Upon successfully attaching, the Jockey will rip at the survivor's face for 5 HP in damage every few seconds. In addition to this, the Jockey can control the Survivor's movements while riding him or her.


In general, the Jockey should ride a survivor far away from the pack or into an obscured area, like a dark room in a building. Better yet, steer the survivor into a greater threat like a Witch or a puddle of Spitter acid. The Jockey can also pilot a survivor straight off of a ledge; this will kill the Jockey and leave the survivor in need of assistance. If the other survivors rescue their hanging cohort immediately, the Jockey death may not be worth it (although it is an entertaining diversion).


The Jockey's ride comes to an end when the survivor is incapacitated or if its knocked off by a melee attack. The recharge period for the leaping grab is 30 seconds, so retreating into a secluded place is essential. The Jockey's secondary attack is a claw swipe that does minimal damage, so maintaining your ground after getting knocked off is not a good idea.


|
| Charger |
The Charger, much like the Jockey, is an important tool for physically separating a pack of survivors. To accomplish this, the Charger uses its main attack -- a charge leveled directly at a survivor. When aimed properly, the Charger will grab a survivor and carry him or a pre-set distance (or until it hits an obstacle). At this point, the Charger pins the survivor and pounds him or her into the ground for 15 HP damage a pound -- that's quite a bit of damage! The Charger cannot be knocked off; it must be killed by the other survivors.


The initial charge can stun -- and slightly damage -- any survivor it hits, even if the charge doesn't result in a successful grab. If the Charger misses (a common occurrence due to clever, side-stepping survivors) his secondary claw swipe attack can be used to inflict a decent amount of damage -- 10 HP a hit. The recharge time for the primary charge attack is long enough to make this useful. Also, the Charger has more life than any special infected other than the Tank, so it can hold its own for a brief period of time.


|
| Spitter |
The Spitter is best used in cooperation with other special infected to inflict huge amounts of damage. The Spitter's primary attack is a green projectile which breaks into a puddle of spit. The projectile seems have a sort of smart-sensing mechanism that allows it to break only when near a survivor or when it hits an obstacle.


The puddle inflicts damage on any survivors standing in it and continues to inflict damage until it dissipates. The amount of damage acid deals rivals that of even the Tank -- it's powerful stuff. Obviously, you'll want to get as many survivors in your spit puddle for as long as possible. Trap them in corners, cut off their progress at bottlenecks and hit them in safehouses and elevators. Additionally, a puddle of Spitter acid under a survivor that's getting attacked by a special infected like a Hunter or Chrager is a death sentence. You can also spray an incapacitated survivor to effectively cut him or her off from rescue.


The Spitter is one of the weakest special infected types, but when destroyed it leaves behind a small puddle of acid to deal damage from beyond the grave. The secondary attack is a weak claw swipe, so directly attacking survivors is only useful when taking into account the puddle you'll leave after being quickly eliminated.


|
| Give us feedback! | Continue Infected Eater's Guide... |
Grand Theft Auto IV: The Ballad of Gay Tony Cheats
Grand Theft Auto: Episodes from Liberty City Cheats
The Elder Scrolls V: Skyrim Cheats
Saints Row: The Third Cheats
Grand Theft Auto IV: The Lost and Damned Cheats
Red Dead Redemption Cheats
Call of Duty: Black Ops Cheats
Assassin's Creed III Cheats
Minecraft (Xbox 360 Edition) Cheats
Call of Duty: Black Ops II Cheats
NDS
Professor Layton and the Last Specter
X360
Forza Motorsport 4
Wii
Rune Factory: Tides of Destiny
NDS
Harvest Moon: The Tale of Two Towns
PS3
Dark Souls
PC
Dark Souls (Prepare to Die Edition)
X360
Warhammer 40,000: Space Marine
Web
War Commander
PS3
Ultimate Marvel Vs. Capcom 3
X360
Trials Evolution
|
Left 4 Dead 2 at IGN
Left 4 Dead 2 Cheats at IGN
Left 4 Dead 2 Guide at IGN
Left 4 Dead 2 at GameSpy
Left 4 Dead 2 at TeamXbox
Left 4 Dead 2 at GameStats
|