The Last Remant Walkthrough
| « | 09 | 10 | 11 | 12 | 13 | 14 | 15 | 16 | » |
| Blackdale (cont.) |
After taking care of those monsters, continue along the passage. You'll now appear in another portion of Blackdale. Almost immediately, the path here branches left and right. Note that there are enemies hanging around to the right, so be ready to initiate the attack. Head up that path to find another harvest point. Here, you'll unearth Weapon Recipe 4. Now return back down the trail and this time follow the path that had taken off to the left (which is now on your right).
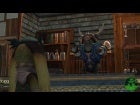
 Enemies near some treasure. |
 That's a hungry Mr. Diggs! |
Ahead, you should see an enemy close by. Beyond him, the path widens and there are more enemies patrolling near a treasure chest. Defeat the goons, then open the chest to find Blackdale Map 1. Just left from there is an extraction point.
Continue onward through the cave, taking care of any airborne enemies you encounter just beyond the harvest point (if they're not dead already). It's also a good idea to save. Just past the last bird, you can enter into the next portion of the caves. This will trigger a cutscene, after which you will find yourself in a battle.
| Boss Battle: Fiery Idol |
This fight looks more impressive than any you've yet faced (and comes only after its fair share of hype), but it's actually pretty simple. First you'll want to take care of the goons that accompany the idol in battle, since they can wear you down if you don't dispose of them quickly. After that, you'll have only the idol to worry about. Try to keep your health up, particularly as you finish off the last soldiers, since the idol likes to use moderately powerful special attacks. You won't be at any risk if your health is in fair shape, but if you're barely hanging on then the fire-based attacks could be enough to finish you. Since your companions will be working to heal you, this attack can for the most part by won without any overall change in strategy compared to any other fight up to this point. Just keep those mystic and combat arts flowing and you should make short work of him.
Once the battle ends, you're going to find yourself in the middle of another lengthy series of cutscenes.
 It looks a lot more powerful than it is. |
 Pull yourself together, Rush! |
When the cutscenes end, David and Torgal's squads leave your party and you're back in the throne room in Athlum. Head to the Virtus Parish portion of the city and you'll find a guard standing in front of the pub with a red text bubble over his head. He tells you that David wants you to return to the castle.
Once you arrive back in the castle, there's another series of cutscenes. The number of unions you can have in your party will increase to 3, plus you'll be advised that you can now recruit soldiers from the town square (talk to a recruiting officer). None of these troops can be leaders, but they can nicely fill out your ranks. You'll also be able to have more leaders and units in battle now, which will surely prove useful down the road to follow. David and the four generals also will join your party at this point. Now you should make any purchases and adjustments needed within town. It's especially important to make use of your ability to recruit troops, since the game will assume that you have done so and will prevent more challenging enemies and quests accordingly. Beef up your troops, then exit to the world map where your next destination (The Ivory Peaks) is now available. Save your progress, then proceed.
| Give us feedback! | Continue Walkthrough... |
Grand Theft Auto IV: The Ballad of Gay Tony Cheats
Grand Theft Auto: Episodes from Liberty City Cheats
The Elder Scrolls V: Skyrim Cheats
Saints Row: The Third Cheats
Grand Theft Auto IV: The Lost and Damned Cheats
Red Dead Redemption Cheats
Call of Duty: Black Ops Cheats
Assassin's Creed III Cheats
Minecraft (Xbox 360 Edition) Cheats
Call of Duty: Black Ops II Cheats
NDS
Professor Layton and the Last Specter
X360
Forza Motorsport 4
Wii
Rune Factory: Tides of Destiny
NDS
Harvest Moon: The Tale of Two Towns
PS3
Dark Souls
PC
Dark Souls (Prepare to Die Edition)
X360
Warhammer 40,000: Space Marine
Web
War Commander
PS3
Ultimate Marvel Vs. Capcom 3
X360
Trials Evolution
|
The Last Remnant at IGN
The Last Remnant Cheats at IGN
The Last Remnant Guide at IGN
The Last Remnant at GameSpy
The Last Remnant at TeamXbox
The Last Remnant at GameStats
|