The Last Remant Walkthrough
| « | 17 | 18 | 19 | 20 | 21 | 22 | 23 | 24 | » |
| The Aqueducts (cont.) |
Head forward along this wide passage and you'll come to a gap. On the other side, you'll see a treasure chest and a patrolling enemy. Closer, there's the top of a rusted ladder. Descend the ladder and walk left along the drained canal. There are some enemies along the way, but they're in plain sight and you should easily gain the initiative. Past those foes, there's a rusted ladder along a wall to the right. Climb up it and now you are on the other side of the canal. There's a passageway leading sharply left here, but first you should head forward to tackle the enemy patrolling ahead.
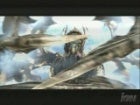
 Torpedo monsters look tough but aren't. |
 Find this ladder left from the platform you move. |
After defeating the monster, check the treasure chest and find Sickbed. Now you can backtrack to the passage that was on your left, but is now on your right. Follow it down a short staircase and ahead there's another large enemy to defeat. Do so, then take a moment to look around. You should see another of the mechanisms to move platforms, as well as the top of a ladder descending into a drained canal. There's also a dead end area up here where you can fight an enemy if it suits you.
Use the lever to make a platform go gliding further down the passageway, then descend the ladder into the canal. Proceed at this lower level to the branch in the path, taking care of the two enemy groups that wait there. You can head right where you found the enemies along a dead-end path that leads to a diving point. Otherwise, proceed along the main path and take the second right passage. Follow this path, defeating enemies along the way. Be watching to the left as you navigate the canal. There's a ladder along one wall that's easy to miss unless you rotate the camera around to see it. You can climb up to defeat an enemy and then beyond that adversary you'll find a treasure chest that holds The Aqueducts Map 1.
Grab the map, then descend back into the canal. Continue along it until you come to the base of the platform you moved. A passageway leads left from there. Head in that direction to find the base of a ladder. Climb the ladder and you'll come almost immediately to another of the mechanisms that can be used to move a platform around. There also are some enemies up here.
 Tired of climbing ladders yet? |
 The path into darkness... |
Defeat the enemies and then use the switch. This will move the nearby platform and unblock a passageway for you. Head back around and climb down the ladder you just climbed a moment before. From the base, you'll now want to head left along the newly-opened passage. You should find a transporter just ahead of a wide passageway leading into darkness. Save your progress, then proceed onward into the blackness.
Though you're getting close, you're not at the end of the aqueducts just yet. Continue forward along the wide canal, making sure to get the initiate on some enemies that you'll find waiting there. Beyond them waits a ladder. Climb up it and walk left. There's a treasure chest here. Open it to find Defender, a powerful sword for Rush. The chest also contains Restobulb(5), Curebulb(3) and Faerie Herb(6).
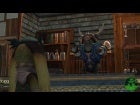
 An old wooden door. |
 Irina this is not... |
From the treasure chest, head right up the sloping path. You'll come to an old wooden door. Before you pass through it, make sure to save your progress and steel your nerves. It's also important that you rearrange your unions so that you now have four groups instead of three. Three of your groups should have four members each, while Rush should form his own group with two others (for a total of three in his union plus 12 spread out among the others). As for configuration, make sure that your heavy hitters are in the other groups, while the warriors you stick with Rush should be the ones with high HP. Finally, make sure that Rush has the Defender sword equipped.
When you're all prepared, pass through the door and to the area just beyond. You'll trigger a cutscene, which is followed immediately by a boss battle.
| Boss Battle: Harpylia |
This battle is with three groups of winged monsters. Though it would be a stretch to call them simple, they shouldn't provide much resistance if you've come to grips with your unions (as you most likely have following the previous boss battle at Nest of Eagles). All you need to do here is hit hard and fast with your most powerful attacks. The monsters are capable of hitting for some extreme damage that will all but wipe out a given union. However, they don't attack an abnormal number of times per round or anything distressing like that, so you should have plenty of opportunity to use healing skills between strikes. Focusing on one of the groups at a time (when possible without exposing yourself too much) will make things simple. This fight shouldn't last long.
| Give us feedback! | Continue Walkthrough... |
Grand Theft Auto IV: The Ballad of Gay Tony Cheats
Grand Theft Auto: Episodes from Liberty City Cheats
The Elder Scrolls V: Skyrim Cheats
Saints Row: The Third Cheats
Grand Theft Auto IV: The Lost and Damned Cheats
Red Dead Redemption Cheats
Call of Duty: Black Ops Cheats
Assassin's Creed III Cheats
Minecraft (Xbox 360 Edition) Cheats
Call of Duty: Black Ops II Cheats
NDS
Professor Layton and the Last Specter
X360
Forza Motorsport 4
Wii
Rune Factory: Tides of Destiny
NDS
Harvest Moon: The Tale of Two Towns
PS3
Dark Souls
PC
Dark Souls (Prepare to Die Edition)
X360
Warhammer 40,000: Space Marine
Web
War Commander
PS3
Ultimate Marvel Vs. Capcom 3
X360
Trials Evolution
|
The Last Remnant at IGN
The Last Remnant Cheats at IGN
The Last Remnant Guide at IGN
The Last Remnant at GameSpy
The Last Remnant at TeamXbox
The Last Remnant at GameStats
|