The Last Remant Walkthrough
| « | 41 | 42 | 43 | 44 | 45 | 46 | 47 | 48 | 49 |
| The Seventh Path |
| Items |
| Satchel, Seventh Path Map, Spike |
Whenever you want to come to The Seventh Path, you'll have to first follow The Sixth Path. There's no direct entrance from the world map. Boo!
From the entrance, head down the long passage ahead. You'll encounter some weredragons. Defeat them and continue along the corridor until it comes to a 'Y' where some harpylia enemies are waiting. They teleport around the area, so proceed with caution and make sure that you get the initiative when you fight them. Once they're tended to, proceed along the path to the left.
 A split in the road. |
 Harpylia monsters use strong skills. |
Along this path, you'll come almost immediately to what looks like a split in the path. The area ahead is blocked off, though, so take the path leading sharply left. Here you'll find an excavation point. Now you can return to the area where you defeated the harpylia monsters a moment ago. This time, take the path that was on the right.
This corridor soon leads to another 'Y,' where you should first head along the passage to the right. Defeat the weredragon enemy unit that lurks there. Beyond it waits a treasure chest. Open the chest to find Spike. Now backtrack to the 'Y' and take the branch that was on the left. There's an excavation point along its left side right as you start along the path. Past that you'll battle more weredragon enemies.
 A split in the path with a harpylia representing! |
 A portal in the depths of the cave. |
Continue past the weredragon monsters and the narrow path will split in two directions. Ahead, you'll see harpylia enemies teleporting about the area. To start, head along the path to the left. It's a dead end, but you'll find a treasure chest that holds Satchel. Watch out for the harpylia monster here that will try to ambush you. Now return to the fork in the path and this time head along the path that was to the right as you approached. Continue along it for awhile and watch its left side as you do, since you'll eventually pass a felling point. Beyond that the path comes to a 'T,' where you can head left to battle a weredragon. Beyond him waits a treasure chest that holds Seventh Path Map.
Now return to the 'T' in the path and this time head along the path that led to the right (which will be the one directly ahead of you as you're returning to the 'T' after grabbing the map).
In this direction, you'll soon come across a weredragon enemy unit. Defeat it and continue along the path, which widens slightly as it heads left around a bend. Around the bend, there are two more weredragon units. Past them, the path splits to the left and right. Head right first, where you'll find a digging point. As for the left path, it leads into a wider chamber equipped with a portal. Beyond the portal, the path curves off toward the left.
 Harpylia monsters near the stairs. |
 Save your progress before passing through the door. |
Continue along the path and you'll face another harpylia unit as you ascend several short flights of stairs. Once you reach the top, there's another of the huge doors that you've seen throughout Siebenbur. Before you pass through it, save your progress.
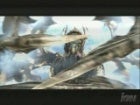
Once you pass through the door, you'll trigger a cutscene. When that concludes, you'll find yourself engaged in a boss battle.
| Boss Battle: Icy Idol |
This boss begins the fight with five units by its side. You should be able to cycle through the units to find an option to summon Cyclops, which you'll likely want to do. With that out of the way, spend the rest of the early fight taking care of the weaker enemy units (which are strong enough to kick your butt if left unattended).
Once it's down to just you and the idol, the fight is all but won. Icy Idol himself has around 300,000 HP (if you're in the mid-90s for battle rank) and spends most of his attacks in a useless fashion. He'll do the occasional area attack, including a particularly nasty acid attack that can wipe you out if you've let your unions lose their HP, but mostly he's a rather simple opponent. Just make sure that you keep your health above half for all unions--the more beyond that, the better--and that you make the most of any AP you have. Flanking attacks work particularly well in this case, and Cyclops will absorb most of the damage there is to be had if you've summoned him to the fray. Again, this struggle is simply a matter of endurance.
When the battle with the icy idol ends, you'll witness a brief cutscene, then appear back in the dungeon with the opportunity to save your progress.
 Icy Idol's acid attack can hit all unions at once. |
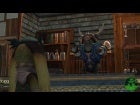
 Irina knows what to do with the Ark! |
After you've saved, continue forward along the available path. Almost immediately, you'll be asked if Irina should bind the Ark. Tell her to go for it and she will. Then you'll appear in the game's next (and final) area.
| Give us feedback! | Continue Walkthrough... |
Grand Theft Auto IV: The Ballad of Gay Tony Cheats
Grand Theft Auto: Episodes from Liberty City Cheats
The Elder Scrolls V: Skyrim Cheats
Saints Row: The Third Cheats
Grand Theft Auto IV: The Lost and Damned Cheats
Red Dead Redemption Cheats
Call of Duty: Black Ops Cheats
Assassin's Creed III Cheats
Minecraft (Xbox 360 Edition) Cheats
Call of Duty: Black Ops II Cheats
NDS
Professor Layton and the Last Specter
X360
Forza Motorsport 4
Wii
Rune Factory: Tides of Destiny
NDS
Harvest Moon: The Tale of Two Towns
PS3
Dark Souls
PC
Dark Souls (Prepare to Die Edition)
X360
Warhammer 40,000: Space Marine
Web
War Commander
PS3
Ultimate Marvel Vs. Capcom 3
X360
Trials Evolution
|
The Last Remnant at IGN
The Last Remnant Cheats at IGN
The Last Remnant Guide at IGN
The Last Remnant at GameSpy
The Last Remnant at TeamXbox
The Last Remnant at GameStats
|