Scene 4: Mozdok Proving Grounds
Archer and Kestrel's last mission together brings them to a large research and airfield complex, to help transport out some EMP warheads for a certain Mr. Kobin.
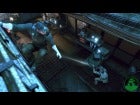
For the first chapter (Logistics), the agents must avoid detection in the warehouse, but they can still kill the guards and shoot out the lights and the cameras. Get to the communications room on the upper level, and do a dual EMP action on the floor panel to put the airfield off the flight grid network. In the back corner of this communications room, find the door that leads into the next warehouse.
For the second chapter (Engineering), work down across the maze-like multi-level walkways. (There is plenty of fun in dragging the enemies over the railings here.) At the lowest level possible, go through a doorway to the next section.


For the third chapter (Test Labs), find a low shaft passageway, and climb up a pipe to enter the testing area. At the bright white airlock room, do a dual activation of the two switches to get into the large silo-like testing chamber. Enter the booth on the middle level, and use the console there to trigger the EMP warhead (deliberately draining it in order to make it transportation-safe). Next, climb the pipes alongside the pillars or find the stairs to reach the high rail walkway, and use the small floor panel there to fix the rail crane and to make it move again. Now return to the bottom floor, and go out through the newly opened doorway to the next corridor.
For the fourth chapter (Airlift), the agents need to see the EMP warhead through a series of rooms, using the pairs of switches at the gates to let the warhead move onward. The odd-numbered rooms have a blocky layout, with the switches on different levels. The even-numbered rooms consist of curved walkways connected by a middle passageway, with the switches also on opposite sides. The last room is the seventh one, where the switches are closer together.


For the final part with Kobin and his cargo plane (the Antonov), the agents need to get into the upper level control booth, and then they have to do a dual EMP action on the floor panel to wreck the turret. When that's done, they need to return to the cargo plane, go up the rear loading ramp, and do a dual activation of the two floor switches (located behind the cover plates) to raise the loading ramp.
Grand Theft Auto IV: The Ballad of Gay Tony Cheats
Grand Theft Auto: Episodes from Liberty City Cheats
The Elder Scrolls V: Skyrim Cheats
Saints Row: The Third Cheats
Grand Theft Auto IV: The Lost and Damned Cheats
Red Dead Redemption Cheats
Call of Duty: Black Ops Cheats
Assassin's Creed III Cheats
Minecraft (Xbox 360 Edition) Cheats
Call of Duty: Black Ops II Cheats
NDS
Professor Layton and the Last Specter
X360
Forza Motorsport 4
Wii
Rune Factory: Tides of Destiny
NDS
Harvest Moon: The Tale of Two Towns
PS3
Dark Souls
PC
Dark Souls (Prepare to Die Edition)
X360
Warhammer 40,000: Space Marine
Web
War Commander
PS3
Ultimate Marvel Vs. Capcom 3
X360
Trials Evolution
|
Tom Clancy's Splinter ... at IGN
Tom Clancy's Splinter ... at GameSpy
Tom Clancy's Splinter ... at TeamXbox
Tom Clancy's Splinter ... at GameStats
|